|
Environmental requirements for applicable
fields:
Temperature:10.C-35.C
Humidity:45%RH-75%RH
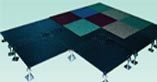
The Construction specification is for
steel access floor, woodcore access floor and also for reference to OA
access floor.
Requirements for the ground:
1. The panels should be laid after the interior decoration finishes.
2. The ground should be flat, clean and dry.
3. Cables, electric lines, water pipes, air pipes and air condition
system which are placed under the floor should be prior to the
installation of the panels.
4. The height of the base for huge and heavy equipment should remain the
same with that of the panel surface after its installation.
5. Electric power and water supply should be provided on
site.
Tools for installation:
1. professional cutting saw
2. laser leveling apparatus and net laser scanner
3. bubble leveling apparatus, band tape and ink recorder.
4. panel-lifter, spanner and screw-drivers
5. dust cleaner, broom and cloth
Installation Step:
STEP 1. Check the room dimensions and configuration against approved drawings.Using a builder's transit or laser, shoot in the areas to
receive access floor to determine how much variation there is in the
level of the sub floor within the room and at the termination points,
such as elevator and door sills and concrete ledges. If the floor cannot
be installed you are your drawings, notify the general contractor
superintendent for agreement on corrective action.The FFH may have to be
changed.
STEP 2. First mark the installation height of the panel on the wall to
ensure the flatness of the panels. Then measure the length and width of
the ground and find the basic position of installation. And then form a
square lattice with pedestals and the conjuncture of the square lattice
is the position of the pedestal base. The cutting of the panels should
be minimized to ensure the wonderful appearance after installation.
Recommended minimum size of the cut panels for proper support is 6 inches
wide.
STEP 3. Put the pedestals and stringers in the conjunctures of the
square lattice, and adjust the height of the pedestals, finally set the
panel in the lattice formed by the pedestals and stringers.
STEP 4. If the remaining size close to the wall is smaller than the size
of a panel, cutting becomes necessary. The cut edge must be smoothed in
case workers get hurt while dealing with it.
STEP 5. While laying the panel, bubble leveling apparatus can be used to
make sure of the surface flatness. The height of the panels can be
adjusted through pedestal adjustment. While laying the panel, it should
be handled with care to avoid the damage of the panels or rubber edges.
Meanwhile, cleaning should be conducted while laying in case the dust
and odds should be left under the panels. |